How to Restore Old Photos with AI: Using Gemini & ChatGPT
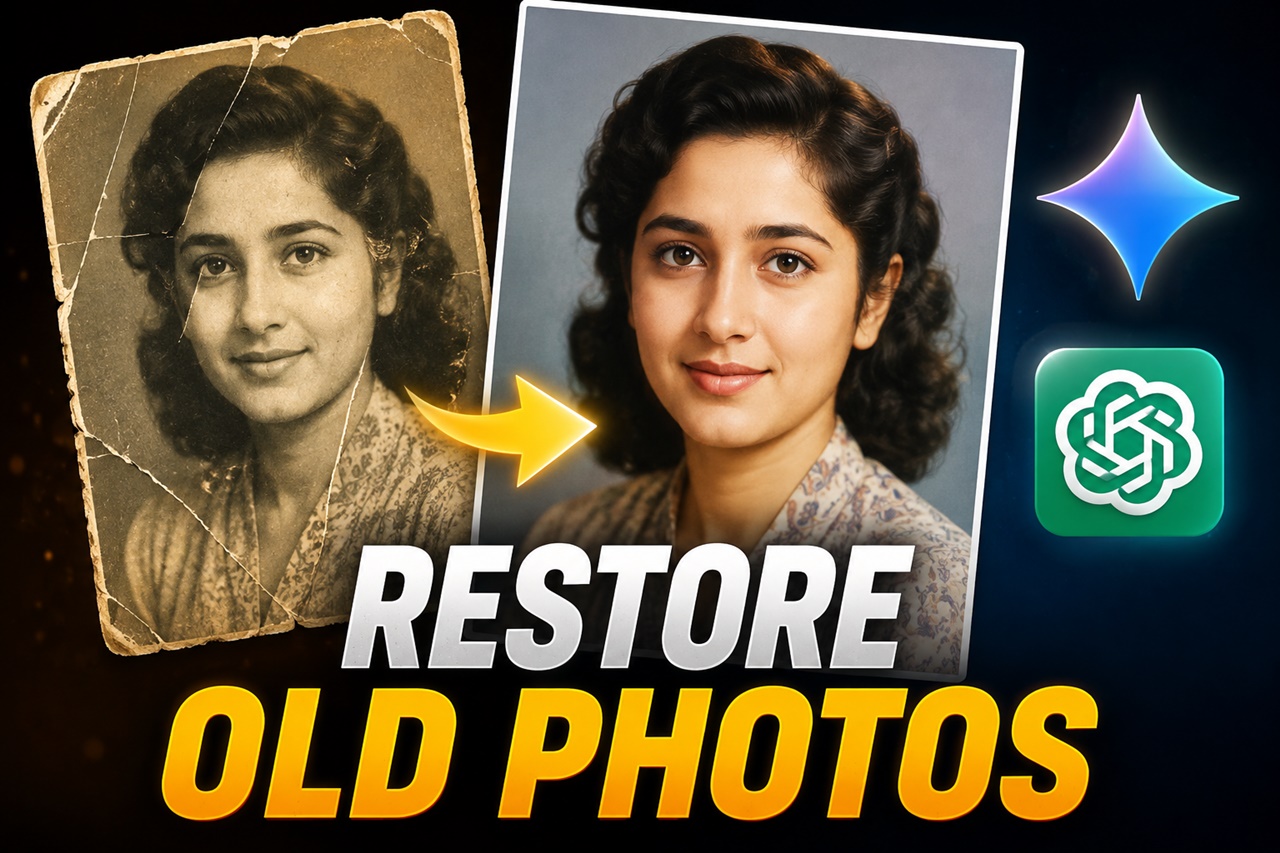
Somewhere in a drawer, a shoebox, or an old photo album, there's probably a picture that means more to your family than almost anything else you own and it's falling apart. Creases run through faces. Water stains have eaten into the corners. The colors have faded to a strange yellow-brown that makes everyone look like they existed in a different world.
For decades, fixing photos like this meant paying a professional restorer hundreds of dollars and waiting weeks. Today, you can get a strikingly good restoration in minutes, using two AI tools you probably already have access to: Gemini and ChatGPT. Neither one is a dedicated photo-restoration app, but used together one for structural repair, the other for detail and color they make a surprisingly powerful, free restoration pipeline.
This guide walks you through the entire process, step by step, with prompt examples you can copy and adapt for your own photos.
Why AI Photo Restoration Actually Works Now
Old-school photo restoration was done manually, pixel by pixel, in Photoshop. It required an artist's eye for how skin, fabric, and light behave, and it took hours per photo. Modern AI image models have effectively learned that same knowledge by studying millions of real photographs, how a wrinkle falls on a smiling face, what film grain looks like, how sunlight behaves on skin tone. That's what lets a model look at a damaged, faded photo and predict, with real confidence, what was probably there originally.
Gemini and ChatGPT aren't specialized restoration tools, but both now support direct image editing and generation from a reference photo, which means you can literally hand them a scanned image and ask them to repair it. Used well, the results rival what a professional studio would charge for.
What You'll Need Before You Start
You don't need any technical skill for this, just a bit of patience. Here's your checklist:
- A good scan or photo of the original. Quality in, quality out. If you're photographing a physical print instead of scanning it, use natural daylight (no flash), lay the photo flat, and avoid shadows or glare.
- Access to Gemini and ChatGPT. Both have free tiers that support image uploads and image generation/editing.
- A little context about the photo. Approximate decade it was taken, and any details you remember (hair color, clothing color, location) this context massively improves colorization accuracy.
- Patience for 4-5 rounds of iteration. The first result is rarely the final one. Restoration is a back-and-forth process, not a single click.
Step 1: Prepare Your Photo the Right Way
Before you touch any AI tool, spend five minutes on the source image itself.
If you're scanning a physical photo, scan at the highest resolution your scanner allows (at least 600 DPI if possible). If you're photographing it with a phone, get as close as you can while keeping the whole photo in frame and in focus, and make sure the photo is flat, curled or bent photos create distortion that AI models can misread as actual damage.
Crop out the background (table, album page, fingers holding the photo) so only the photograph itself remains. This single step improves AI output quality more than people expect, because the model won't waste its "attention" trying to interpret irrelevant surroundings.
Step 2: Use Gemini to Repair Structural Damage
Gemini tends to be strong at understanding an uploaded image holistically and making edits that respect the original composition, which makes it a good first pass for structural repair, creases, tears, scratches, missing chunks, and water damage.
Upload your prepared photo and try a prompt like this:
"This is a genuine old family photograph that has physical damage like creases, scratches, and a torn corner. Please restore it by repairing the physical damage only. Keep the people's faces, expressions, clothing, and the overall scene exactly as they are. Do not change anyone's identity or add anything that wasn't in the original photo. Do not colorize it, keep same colors, if it is b&w keep it that b&w, if its sepia keep it that way."
Notice the instruction to not colorize yet. It's better to separate structural repair and colorization into two distinct steps, combining them in one prompt often produces muddier, less controllable results.
Review the output carefully. Zoom in on faces first, since that's where AI restoration most commonly introduces subtle errors (an eye that looks slightly off, a nose that's reshaped). If something looks wrong, don't accept it, re-run the prompt, or add a correction like:
"The left eye in the previous result looks distorted. Please redo the restoration and keep both eyes symmetrical and true to the original photo."
Step 3: Use ChatGPT to Colorize and Add Depth
Once you have a clean, structurally repaired black-and-white version, move to ChatGPT for colorization and fine detail enhancement. ChatGPT's image generation tends to handle color grading and lighting nuance well, which is exactly what colorization needs.
Upload the restored black-and-white photo and try:
"Colorize this restored black-and-white photograph realistically, as if it were taken in [decade, e.g. the 1970s]. Use natural, period-accurate skin tones and avoid oversaturated or artificial-looking colors. [Add any known details, e.g. 'The dress was known to be a pale blue, and the car in the background was maroon.'] Keep everything else about the photo exactly the same, do not alter faces, poses, or the background structure."
The bracketed details matter enormously. AI colorization without context will guess reasonable-looking but often wrong colors (for example, defaulting brown eyes to blue, or guessing a black dress was navy). Any real detail you can supply anchors the output in truth rather than plausible fiction.
Step 4: Upscale and Sharpen the Final Result
After structural repair and colorization, your photo may still look slightly soft or low-resolution, especially if the original scan was small. Ask either tool to upscale:
"Please upscale this image to a higher resolution while preserving all facial details and avoiding any plastic or overly smooth AI texture. Keep skin texture and fine details natural, not airbrushed."
That last instruction, asking it to avoid an "airbrushed" or "plastic" look is important. Left unguided, AI upscalers tend to over-smooth skin, which can make a restored photo look artificial rather than genuinely old. Explicitly asking for natural texture noticeably improves realism.
Common Mistakes to Avoid
A few pitfalls come up again and again with beginners:
- Combining too many fixes in one prompt. Asking a model to repair damage, colorize, upscale, and change the background all at once usually produces a worse result than doing each step separately.
- Not zooming in on faces. AI restoration errors are most damaging and most common around eyes, mouths, and hands. Always inspect these closely before accepting a result.
- Skipping known details. The more real information you feed the AI (colors, era, location), the less it has to guess, and the more faithful the restoration will be.
- Expecting one perfect result. Treat restoration as iterative. Four or five rounds of small corrections almost always beats trying to get it right in a single prompt.
- Losing the original file. Always keep your original scan untouched. Just in case the models get more advance in future and we can do better restoration.
When to Use Dedicated Tools Instead
Gemini and ChatGPT are excellent for casual, one-off restorations, but if you're restoring dozens of family photos, tagging and organizing a large archive, or need finer manual control over damage repair, dedicated tools built specifically for this purpose will save you time.
Whether you are looking to surprise your parents with a revived portrait from their wedding day or trying to finally see the face of a great-grandparent clearly, AI makes it possible. So dig out those old photo albums, pick out a few of your favorites, and start experimenting. The past has never looked so clear.